When creating a design for printing, without printing knowledge, the artwork may not be as ‘print ready’ as you expect. There are several factors to consider when preparing a print-ready artwork to ensure the best possible outcome for your prints. We’ve prepared a checklist to help identify the crucial points to double check before sending your artwork for printing. Read on below to help conduct your own step-by-step prepress examination of your files! Not only will it save you time and a ton of headaches, it can also save you a ton of money!
1. Check Artwork Size
The first thing to confirm before printing is your design size. Make sure your design is created in the size you want to print so you get no surprises when the design goes to print and there will not be any sudden changes in the layout or the look of the design. For example, if you want an A4 flyer, design your artwork in A4.
2. Apply Bleed & Check Safety Margins
Bleed refers to the extra 3mm distance extended outside of your design size that will be cut off during production and is there to avoid any white borders during printing.
Safety margin is 3mm distance inside of your design and we recommend leaving the margins empty to avoid any important design too close to the edges and getting cut off during printing.
Both these elements are there to ensure your prints can be as accurate as possible.
3. Apply Crop / Trim Marks
Crop marks / trim marks are lines in the corners of your design that indicate exactly where to trim the paper. Preparing trim marks show us exactly what is the design and the size you want.
4. Avoid Borders / Frames
Although we would like to be as accurate as possible during printing, we use large print machines that cut many sheets of paper at once. During this process, the papers may shift very slightly so any borders may not be even upon printing regardless of how accurate the design is prepared.
5. Check Text is Legible
The minimum text size for printing is 6pt. Also double check your font type and colour as thin fonts and lighter colours may be difficult to read.
6. Proofread Everything
This is especially important as it can be easy to miss grammatical or spelling mistakes during the design process. Printing companies do not usually include this in their prepress process so it’s crucial you get someone to proofread your design to confirm there are no errors before printing. It will save you time and money when you don’t have to reprint due to small but obvious mistakes.
7. Use Correct Colour Mode (CMYK, Not RGB)
We print using CMYK colour mode, which is the main colour mode used in printing. RGB is mainly used for digital purposes and screens. Make sure your design is in CMYK mode to avoid any colour changes and be as accurate to your designed colours.
8. Check Images Are High Resolution
We recommend providing high resolution images (300DPI) in your design to avoid any blurriness during printing.
9. Use Vectors When Possible
Please use vector images / logos in your designs when possible as vector images will always be sharp no matter the size. Vector images are necessary for spot colour printing, hot stamping, spot varnish and custom shapes. They are also flexible and the best print results come from using vector images.
10. Outline Your Text & Embed Images
Creating outlines for your text will convert your text to graphics (vectors). This is because there are many fonts out there and not all printers have access to all the fonts. Once fonts are outlined, our printers can print the text (detected as graphics) even if we do not have the specific fonts.
Embedding raster images in your file is a process that includes the image or font data within the document file so any printer can read the images information in the file itself and allows for consistent printing without missing images.
However, please note that outlining text and embedding images may make it harder to edit the document. So always save a separate copy for printing purposes.
11. Select Suitable Paper
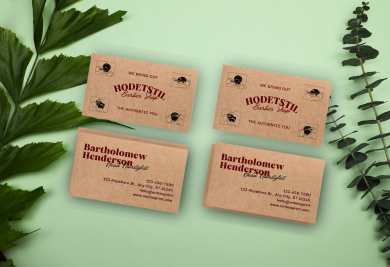
Consider your design and the purpose of the prints when selecting the paper material. For example, Kraft Card is a brown material and anything printed will appear darker so make sure the design is suitable for a darker background.
12. Save Files As PDF
PDF format is the most popular and safest file format for printing. It also ensures that any formatting and layout are preserved, and can significantly reduce file size, avoiding issues during printing.

By following this comprehensive checklist for preparing print-ready artwork, you can save time, avoid potential errors, and ensure the highest quality output for your prints. Aways collaborate with your print partner to double check the design is ready for printing. Do check us out as we at Ontimeprint conduct prepress checks that go through your designs to ensure they are as print-ready as possible. We also offer express printing that allows for sameday delivery, should you need it.


