

STEP 1Choose Your Options
Need help configuring your product or preparing your artwork?
10400, BANGKOK
Spot Varnish Invitation Cards
Format
Choose Format
Can't find the size you need?
Infos & Tips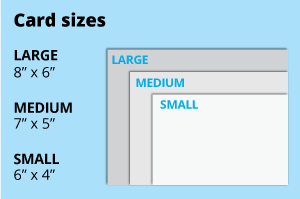 For the spot varnish greeting cards, choose from the popular 4x6, 5x7 or 6x8 inches dimensions, ideal for standard envelopes. Opt for a larger size for bigger artwork or create a custom size with ease.
For the spot varnish greeting cards, choose from the popular 4x6, 5x7 or 6x8 inches dimensions, ideal for standard envelopes. Opt for a larger size for bigger artwork or create a custom size with ease.How to choose the right size?
"If you have an artwork, check the size using Adobe Acrobat's 'Check Document Property' feature; find more info here If you do not have an Artwork file ready, feel free to use any one of the templates provided for the standard sizes. "Side Of Print
Choose Side Of Print
Infos & Tips Select single or double-sided printing for your product.
Select single or double-sided printing for your product.How to choose your option?
For single-sided printing, choose if the second page is blank. Opt for double-sided printing if both sides have content, including the page with lines as artwork.What's more popular?
For a popular choice, opt for printing on both sides, to print lines to provide a written area. Unsure? Refer to our backside printing sample artwork.Paper Type
Choose Paper Type
Infos & Tips We offer a wide range of materials so that you can choose the perfect one for your needs
We offer a wide range of materials so that you can choose the perfect one for your needsHaving difficulty choosing which material is best for you?
choose the sleek sheen of Glossy Art Card at 260g for vibrant prints, opt for the sturdy premium feel of 300g Art Card Glossy.Finishing
Choose Finishing
Infos & Tips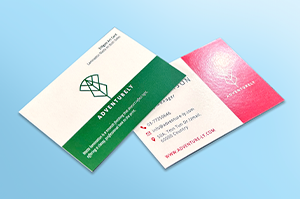 Wide selection of synthetic finishes is offered to elevate your product.
Wide selection of synthetic finishes is offered to elevate your product. How to choose which finishing is suitable for you?
"Matte lamination offers a smooth, non-glossy feel, while glossy lamination provides a shiny finish. The spot varnish finishing is to highlight certain part of your artwork to draw more attention with a captivating glossy finish on specific spots. "STEP 2
Choose a Quantity & Delivery Date
Please select the price below to see the cutoff time.
Quantities
Receive your products by
100 pcs
200 pcs
300 pcs
500 pcs
1,000 pcs
Wed, 7 May
Fastest
Can't find the quantity you're looking for? You can add a custom quantity you want
Set Custom Quantity